How to Make Your Own Cat Food: Easy Homemade Recipes
Published on August 22, 2025
Making your own cat food is a big commitment, but it’s one that puts you in the driver's seat. At its core, it's about building a meal from scratch using high-quality animal protein, healthy fats, and crucial supplements like taurine. You get to create a fresh, unprocessed diet perfectly suited to your cat, cutting out all the fillers and mysterious ingredients you might find in commercial kibble.
So, Why Go Through All The Trouble?
Deciding to switch from store-bought food to homemade meals is a huge step. But for many cat owners, the improvements in their cat’s health make it all worthwhile. It really comes down to wanting transparency and quality—knowing exactly what your cat is eating and ditching processed foods packed with artificial stuff.
It's not just a niche trend, either. The global cat food market was valued at a whopping USD 38.26 billion and is still growing. A big reason for that growth is that more and more pet owners are questioning what’s really in commercial pet food. You can find more details on this trend over at Straits Research. This growing awareness is what pushes so many of us to start exploring homemade options in the first place.
You're in Complete Control
This is probably the biggest perk of making your own cat food. You have total authority over every single thing that goes into their bowl. You pick the meat, you ensure there are no common allergens like corn or soy, and you get to skip all the artificial preservatives, colors, and flavors that can cause problems.
Think about it: if your cat has a sensitive stomach or a known food allergy, you can build a recipe that avoids those specific triggers entirely. It’s a level of customization you just can't get from a bag, even one labeled for "sensitive systems."
Better Health You Can Actually See
It’s not just talk. Many people who make the switch notice real, tangible improvements in their cat's health. When a cat’s diet is full of high-quality, easily digestible nutrients, the results often speak for themselves.
Here are a few of the changes I've seen and heard about time and time again:
- A Softer, Shinier Coat: Fresh meat and fish oil are packed with the essential fatty acids that make a cat’s fur incredibly soft and glossy.
- More Pep in Their Step: Cats are true carnivores—they're built to get their energy from animal protein, not carbs. A diet that respects this biology fuels them far more effectively.
- Healthier Digestion: Without all the unnecessary fillers, a cat’s digestive system can work much more efficiently. This often means smaller, less stinky stools and fewer tummy troubles.
- Easier Weight Management: A high-protein, low-carb diet helps maintain lean muscle and can prevent the weight gain often linked to carb-heavy kibble.
A well-planned homemade diet isn't just about feeding your cat—it's one of the best forms of preventive healthcare you can provide. It lets you fine-tune their nutrition for their specific age, health conditions, and personal quirks, which can help head off diet-related problems later on.
To put it all in perspective, here’s a quick comparison of what you can expect from a standard commercial diet versus a carefully prepared homemade one.
Commercial vs Homemade Cat Food: A Quick Comparison
| Attribute | Commercial Cat Food | Homemade Cat Food |
|---|---|---|
| Ingredient Quality | Often variable; may contain fillers and by-products. | You control the source and quality of every ingredient. |
| Transparency | Ingredient lists can be confusing or vague. | Full transparency—you know exactly what's in the food. |
| Moisture Content | Low in dry kibble, which can lead to dehydration. | High in natural moisture, supporting urinary tract health. |
| Customization | Limited to available formulas. | Fully customizable for allergies, age, and health needs. |
Looking at them side-by-side, it's clear that while commercial food offers convenience, a homemade diet provides an unparalleled level of quality, transparency, and personalization for your cat's long-term health.
Mastering Your Cat's Nutritional Blueprint

Before you ever pull out a cutting board, let's talk about the "why." Understanding your cat's unique biology is the single most important part of making their food. Here's the bottom line: cats are not little dogs. They are obligate carnivores, meaning their bodies are built from the ground up to run on a diet of animal protein and fat. It’s not a lifestyle choice for them; it’s a biological mandate.
Their digestive tracts are short and specifically designed to process meat efficiently. They don't have the right enzymes to get much value from plants. This core principle—that cats are meat-eaters, period—should guide every choice you make.
Why Animal Protein is King
Protein is the cornerstone, but the source of that protein is what really counts. Animal-based proteins deliver the complete amino acid profile that a cat’s body requires. Plant proteins just can't do the same job for a feline. These powerful amino acids fuel everything from muscle development to a strong immune system.
When you're shopping, think in terms of high-quality muscle meat. I often reach for chicken thighs (they have a better fat content than breasts), turkey, duck, or rabbit. This is worlds away from the processed meat "meals" and starchy fillers that bulk up so many commercial foods. We're trying to get as close as we can to what they’d eat in the wild.
Taurine: The Non-Negotiable Nutrient
If there's one nutrient you can't afford to get wrong, it's taurine. While other animals can make taurine internally, cats can only produce tiny amounts. They absolutely must get it from their food. A taurine deficiency is incredibly serious and can lead to devastating health issues.
- Dilated Cardiomyopathy (DCM): A life-threatening heart condition where the heart muscle weakens.
- Feline Central Retinal Degeneration (FCRD): This can cause permanent, irreversible blindness.
- Reproductive Problems: Taurine is essential for healthy pregnancies and kitten development.
Taurine is found naturally in animal muscle, especially in heart and dark meat. But here's the catch: it's sensitive and degrades with heat and even grinding. This is why every homemade diet, whether cooked or raw, must be fortified with a taurine supplement. There’s no room for guesswork here.
It's no wonder so many people are exploring homemade diets. With about 70% of U.S. households owning a pet, owners are more invested than ever in their companions' health. A report from Global Market Insights highlights how this trend is driven by a desire to manage issues like weight and food sensitivities.
Balancing Fats and Other Essentials
After protein, healthy fats are your cat's primary energy source. They also provide essential omega-3 and omega-6 fatty acids, which are fantastic for maintaining healthy skin and a shiny coat, taming inflammation, and supporting brain health. Good sources include the fat already in the meat, chicken skin (in moderation), or supplements like a high-quality fish or salmon oil.
But a balanced diet is more than just meat and fat. You also have to supply a precise blend of vitamins and minerals. This is where organ meats and a safe bone source come in. For cats with known sensitivities, getting this mix right is even more critical. If you're navigating food allergies, our guide on the https://foodrank.pet/cat/blog/best-limited-ingredient-cat-food has some great insights for narrowing down troublesome ingredients.
Essential Nutrients for Your Cat's Diet
Getting a handle on these key nutrients is crucial before you start cooking. This table gives you a quick-glance guide to what your cat needs and where you can find it.
| Nutrient | Primary Function | Best Homemade Food Sources |
|---|---|---|
| Animal Protein | Builds and repairs tissues, provides energy | Chicken thighs, turkey, rabbit, beef |
| Taurine | Supports heart health, vision, and digestion | Heart muscle (e.g., chicken hearts), supplement powder |
| Calcium & Phosphorus | Essential for strong bones and teeth | Finely ground bone, bone meal supplement |
| Omega-3 Fatty Acids | Reduces inflammation, supports skin and coat health | Salmon oil, fish oil, sardines (in water, no salt) |
| Vitamin A | Crucial for vision, immune function, and growth | Liver (use in small, controlled amounts) |
| B Vitamins | Supports energy metabolism and nervous system function | Muscle meat, organ meats, nutritional yeast |
Think of this as your nutritional blueprint. Once you have this down, you're ready to build meals that don't just fill your cat's bowl but truly nourish them from the inside out.
Getting Your Kitchen Cat-Ready
Alright, this is where the fun really begins. You've got the theory down, you understand what your cat needs, and now it's time to actually make some food. Rolling up your sleeves and turning ingredients into meals is incredibly rewarding.
Setting up your space properly makes all the difference. You don't need a commercial kitchen, but having the right tools on hand will take this from a stressful chore to a smooth, efficient process. A little prep work now saves a ton of headaches later.
The Must-Have Tools
Think of this as a small, one-time investment for your cat's long-term health. These items are non-negotiable for making safe and nutritionally sound food.
A Solid Meat Grinder: This is your workhorse. A good grinder will chew through muscle meat, organs, and even small, soft bones (like chicken wings or rabbit) without breaking a sweat. I’d recommend a model with at least a 500-watt motor so it doesn’t struggle. Grinding it yourself gives you total control over the final product.
Digital Kitchen Scale: This is absolutely critical. Balancing a recipe is a science, and guessing measurements can throw everything off, leading to nutrient imbalances. Get a scale that measures in grams for pinpoint accuracy. This isn't the place to "eyeball it."
Big Mixing Bowls: You'll be making food in large batches, so you need room to work. I prefer a set of large stainless steel or glass bowls because they don’t hold onto bacteria like plastic can, and they're a breeze to sanitize.
Sharp Knives & a Dedicated Cutting Board: A sharp knife is a safe knife. You’ll be dicing meat and tough organs, and a good blade makes the job much easier. To avoid any risk of cross-contamination, get a cutting board that you use only for your cat's food. I use a red one just so I never mix it up.
Sourcing High-Quality Ingredients
Now, let's talk about the good stuff—what you'll actually be putting in the bowl. The quality of your ingredients directly impacts the quality of your cat's health. Always aim for fresh, human-grade food.
Your shopping list will break down into three core groups.
Muscle Meats: The Foundation
This is the main event, making up roughly 75-80% of the recipe by weight.
Chicken and turkey thighs are fantastic places to start. They have a naturally higher fat content than super-lean breast meat, which is exactly what a cat's diet calls for. Rabbit is another brilliant option, especially for cats with sensitivities to other proteins.
Organ Meats: The Nutrient Powerhouses
Think of these as nature's multivitamins. They are incredibly dense in essential nutrients.
A good rule of thumb is to have liver make up about 5% of the meal for its rich Vitamin A content. Another 5% should come from a different secreting organ, like a kidney. And don't forget the heart! While it's technically a muscle, it's packed with taurine, making it an essential part of the mix.
Supplements: Filling in the Gaps
Even with the best ingredients, you’ll still need a few supplements to create a complete and balanced meal. This is how we ensure there are no nutritional holes in the diet.
Your core supplement list should always include a high-quality taurine powder, wild-caught fish oil (for Omega-3 fatty acids), and Vitamin E. Depending on the specifics of your recipe, you might also need a Vitamin B-complex and a source of calcium, like finely ground bone meal, if you aren't grinding whole bones.
Finding everything is easier than you might think. I've found that local butchers are a goldmine for organ meats and are often willing to set aside specific cuts if you ask. For supplements, there are many reputable online pet health stores that specialize in products for homemade diets. A little planning goes a long way—buying in bulk when you see a sale can seriously reduce the cost over time.
A Balanced Raw Cat Food Recipe You Can Trust
Jumping into the world of homemade cat food can feel like a huge undertaking, but this recipe is one I’ve relied on for years as a solid starting point. We're going to stick to ingredients that are easy to find and walk through every step. I'll explain not just what to do, but why each component is so critical for your cat's health.
This recipe is built around the principles of a balanced, species-appropriate raw diet. You'll end up with about a one to two-week supply for a single cat, though this can vary based on their size and how active they are. A quick but important note: precision is everything. Please use a digital scale to weigh your ingredients.
Gathering Your Ingredients
Before you start chopping and grinding, get everything out on the counter. Trust me, having all your ingredients measured and ready to go makes the whole process feel less chaotic and much more manageable.
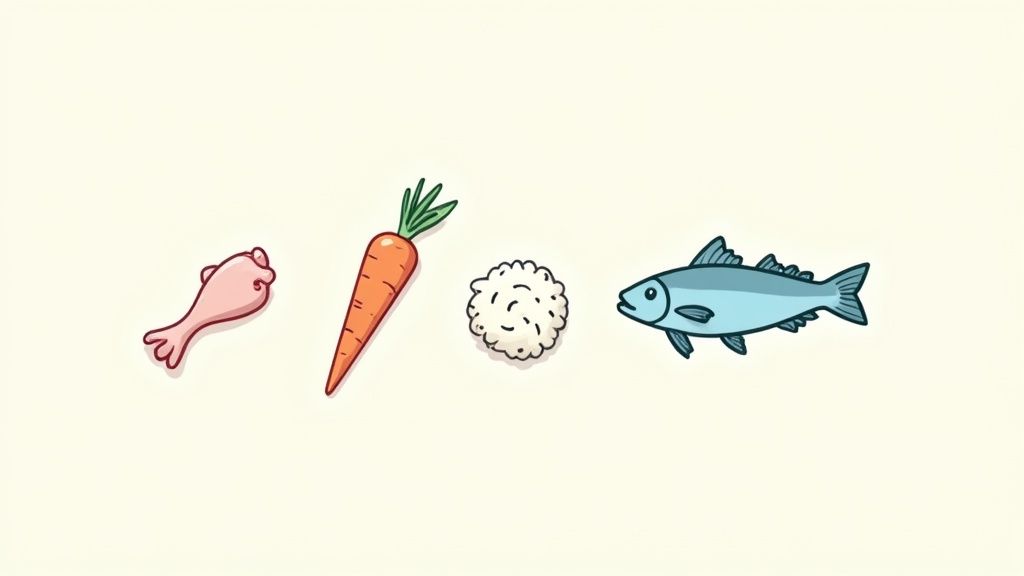
Here’s what you’ll need to grab for this foundational raw recipe:
- 2 kg (about 4.4 lbs) of bone-in chicken thighs: I love using thighs because they provide a fantastic mix of muscle meat, fat, skin, and bone. This creates the protein and calcium base for the entire meal.
- 400 g (about 14 oz) of chicken hearts: While it's a muscle, the heart is an absolute goldmine of taurine—a non-negotiable amino acid for cats.
- 200 g (about 7 oz) of chicken liver: Liver is a true nutrient powerhouse, loaded with Vitamin A and other essential minerals. It's vital, but you have to get the proportions right to avoid vitamin toxicity.
- 4 large egg yolks: Yolks add healthy fats, vitamins, and minerals. We skip the whites because they contain a protein called avidin, which can interfere with the absorption of biotin.
- 4 capsules of high-quality fish oil: This is your source for crucial omega-3 fatty acids (EPA and DHA), which do wonders for skin, coat, and joint health while helping to reduce inflammation.
- 400 IU Vitamin E: A powerful antioxidant that partners with fish oil to protect the body from oxidative damage. As a bonus, it also helps preserve the food's freshness.
- 200 mg Vitamin B-complex: The grinding and freezing process can diminish some B vitamins, so adding a B-complex ensures your cat has what it needs for energy and a healthy nervous system.
- 2000 mg Taurine powder: Even with taurine-rich hearts in the mix, I always add extra taurine powder. Think of it as a critical insurance policy. It's water-soluble, so any excess is simply and safely flushed from the body.
My Personal Tip: When I first started, I made a habit of measuring out all my supplements into little bowls before I even touched the meat. It's a simple trick that keeps me from forgetting something crucial and saves me from having to constantly wash my hands to open supplement jars.
The Grinding and Mixing Process
Alright, now for the hands-on part. A clean workspace is absolutely non-negotiable here, both for the quality of the food and for safety.
First, let's prep the meat. I find that partially freezing the chicken thighs for about an hour makes them firm and much easier for the grinder to handle. Chop the thighs into chunks that can easily fit down your grinder's chute. Remember to include everything—the bones, skin, and fat are all part of the balanced nutrition.
After the chicken thighs are ground, switch to a coarser grinding plate (if you have one) and run the chicken hearts and liver through. Using a slightly coarser grind for the organs adds a bit of texture that many cats seem to really appreciate.
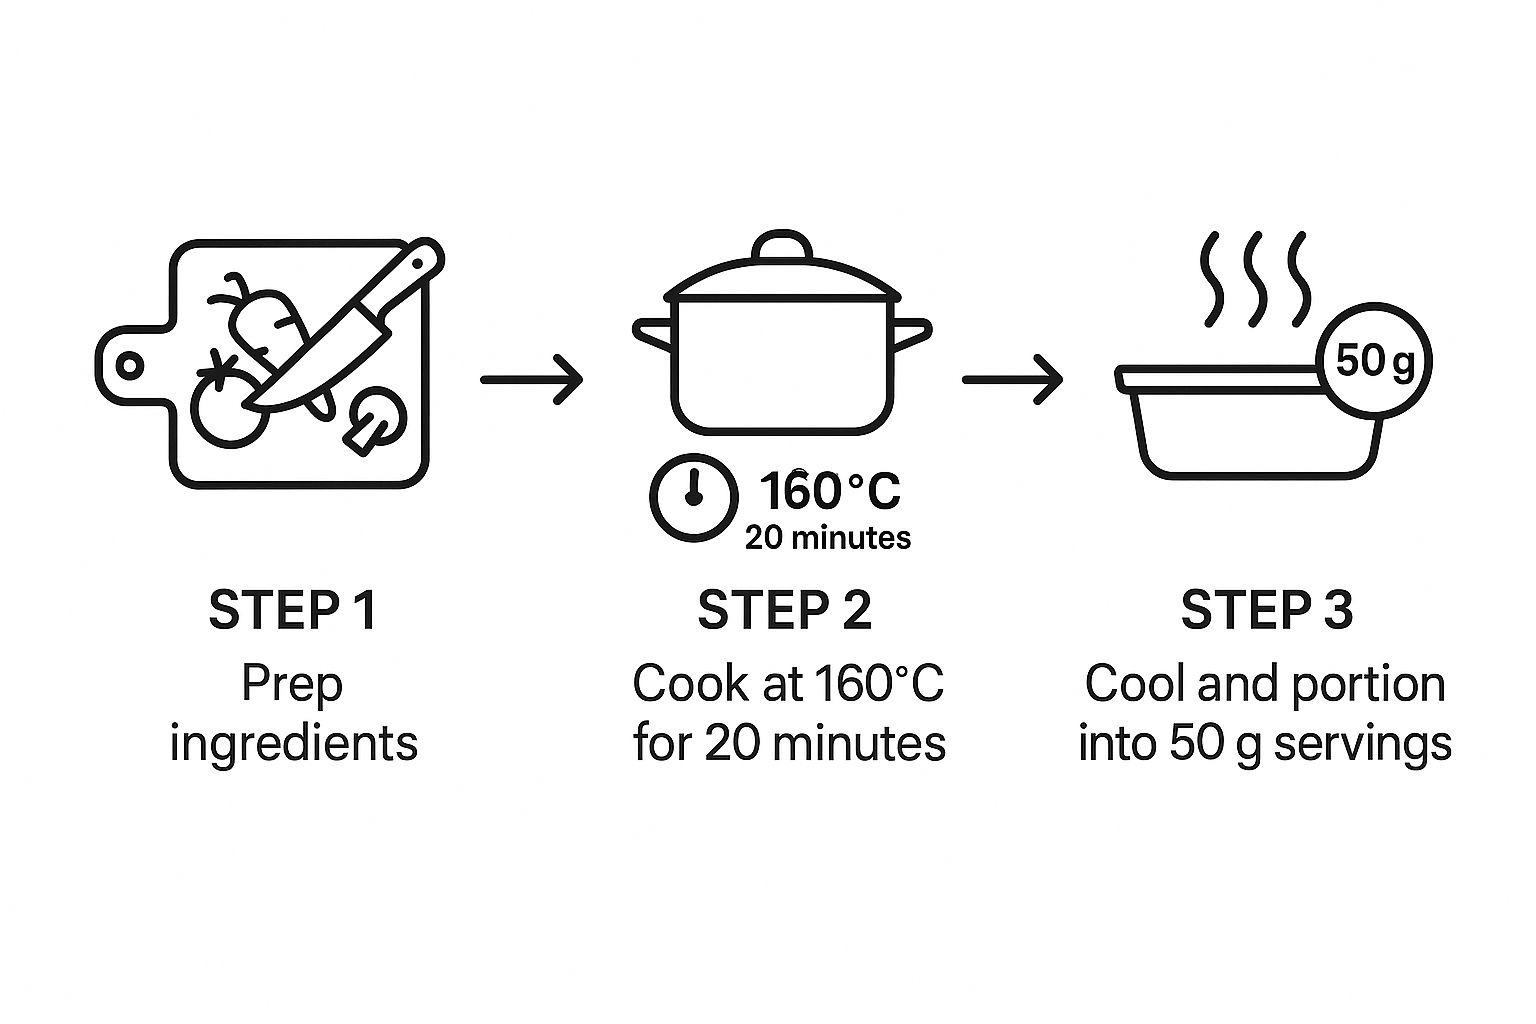
This visual really captures the streamlined workflow, from prep to portioning, that makes producing big batches so much more efficient.
Achieving the Perfect Mix
In a very large bowl, combine your ground chicken thigh mixture, the ground organs, and the four egg yolks. Give these a thorough mix first to make sure the nutrient-dense organ meat is spread evenly throughout the muscle meat base.
Now for the supplements. In a small, separate bowl, add about a cup of water and whisk in all your powdered supplements—the taurine, B-complex, and the powder from the Vitamin E capsules. Keep stirring until they’re completely dissolved. This "supplement slurry" is my secret weapon for guaranteeing that every single bite is nutritionally consistent.
Pour the supplement slurry and the fish oil over your meat mixture. It's time to get your hands in there. Using your hands (I highly recommend wearing food-safe gloves) is truly the best way to get everything combined. Knead and fold the mixture until you’re confident it's all uniformly incorporated.
Portioning and Storing for Freshness
The last step is all about portioning and storing your cat’s new food safely. The average 10-pound cat usually eats about 4-6 ounces of food per day, typically split into two meals. Of course, this is just a starting point.
- For a 10 lb cat: I’d suggest portioning out servings of roughly 4 oz (113 g).
- For smaller cats or multiple small meals: 2 oz (57 g) portions work great.
Use your digital scale for this part to keep servings consistent. I've found that small glass containers, BPA-free plastic tubs, or even silicone ice cube trays are perfect for portioning.
Pack the containers, leaving a little room at the top for the food to expand as it freezes. Don't forget to label each one with the date you made it. Pop them straight into the freezer, where the food will stay fresh for up to three months. To serve, just move a portion or two to the fridge to thaw overnight. A crucial safety note: never use a microwave to thaw raw food. It can cook the bone fragments, making them brittle and dangerous.
Safe Handling and Storing Your Homemade Food
You’ve just made a beautiful, nutritionally balanced batch of cat food. That’s a huge accomplishment, but the job isn't quite done yet. How you handle and store that food is every bit as important as the ingredients you chose.
Getting this part right ensures every meal is safe and free from harmful bacteria that could make your cat—or even your family—sick.
This desire for more control over what goes into our pets' bowls is a major reason so many of us start making our own cat food. It's a global trend, really. People are looking to avoid the fillers and artificial preservatives in commercial foods, a shift detailed by Expert Market Research.
Thankfully, keeping your homemade cat food safe just takes a bit of kitchen common sense. Let's walk through it.
Preventing Cross-Contamination in Your Kitchen
Working with raw meat means your kitchen can become a hot zone for bacteria like Salmonella and E. coli. Your top priority has to be preventing cross-contamination. Simply put: anything the raw meat touches needs to be contained and then sanitized.
To make this easier, I highly recommend creating a dedicated “cat food zone” with its own set of tools.
- Designated Cutting Board: Get a non-porous cutting board (plastic or glass is much better than wood for raw meat) and use it only for your cat’s food. I use a bright red one, so there’s no chance of a mix-up.
- Separate Utensils: Keep a specific set of knives, mixing bowls, and spatulas just for this task. It’s a simple habit that dramatically cuts down the risk of spreading bacteria.
Once you’re finished, it’s cleanup time. Every surface, tool, and even the sink needs to be washed with hot, soapy water and then sanitized. A simple solution of one tablespoon of unscented bleach per gallon of water works great. Just spray it on, let it sit for a few minutes, and wipe it down.
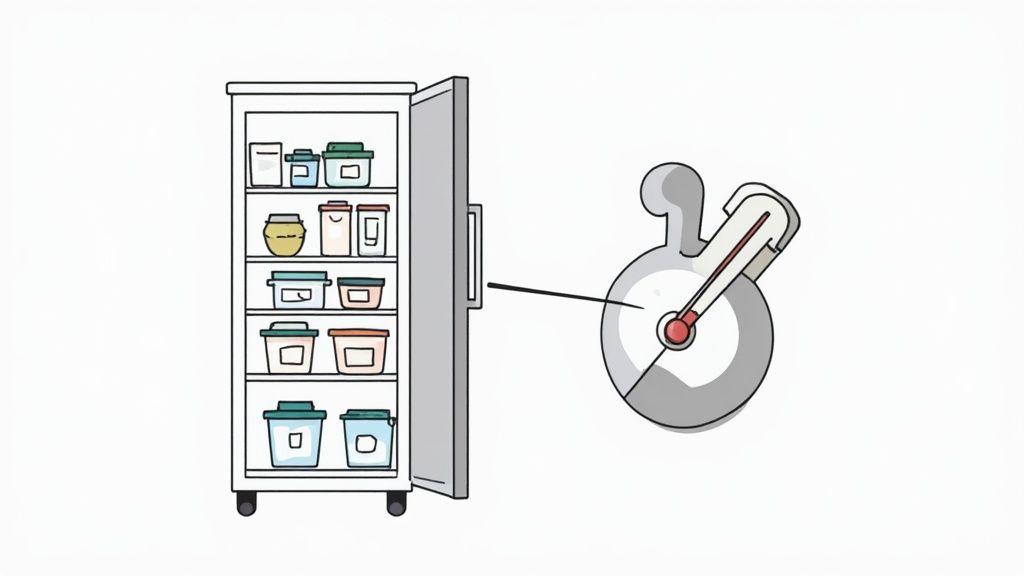
Safe Freezing and Thawing Protocols
Your freezer is your best friend for preserving all those nutrients and stopping bacteria in their tracks. As soon as you’ve portioned out the batch, get it straight into the freezer. You want it to freeze as quickly as possible, so don't let it sit on the counter.
An important thing to remember: Freezing doesn't actually kill most bacteria; it just makes them dormant. That's why your thawing method is so critical. Bacteria can multiply like crazy in the "danger zone," which is between 40°F and 140°F (4°C and 60°C).
This is why you should never thaw your cat’s raw food on the kitchen counter. The outer layers will warm up and enter that danger zone long before the inside is thawed.
Best Practices for Thawing and Serving
The safest way to thaw homemade cat food is slowly and gently in the refrigerator. Just move the next day's portions from the freezer to the fridge the night before. This keeps the food at a consistently safe, cool temperature.
Here’s a quick guide to how long you can safely store the food:
| Storage Location | Maximum Safe Duration | My Pro Tip |
|---|---|---|
| Freezer | Up to 3 months | Always label every container with the date it was made. This lets you use a "first in, first out" system easily. |
| Refrigerator | No more than 2-3 days | Once it's thawed, the clock is ticking. Only thaw what you know you'll use in that window to keep it fresh. |
When it’s time to eat, serve the food in a clean stainless steel or ceramic bowl. These materials are non-porous and way easier to sanitize than plastic, which can get tiny scratches that trap bacteria.
And, of course, after your cat finishes their meal, wash that bowl with hot, soapy water. Every single time. Following these steps ensures every bowl you serve is as safe and healthy as it is delicious.
Getting Your Cat On Board with Their New Diet
Getting a cat to try something new, especially food, can be a real test of patience. Cats are notoriously skeptical of change, and a sudden switch can cause everything from digestive upset to an outright hunger strike. The key is to go slow. Really slow.
So many well-intentioned owners make the mistake of rushing this part. A gradual transition is so much kinder to your cat's system and makes it far more likely they’ll actually accept the healthy food you’ve worked so hard to prepare.
The Slow and Steady Mixing Approach
The best method I’ve found over the years is to slowly mix the new homemade food into their old, familiar food. You’re essentially letting their taste buds and digestive tract get used to the new ingredients over several weeks, not just a few days. It's less of a shock to the system.
I usually suggest a transition period of at least two or three weeks. But honestly, if you have a particularly picky or sensitive cat, don't hesitate to stretch that out even longer.
A Crucial Warning: Never, ever try to starve your cat into eating a new food. If a cat goes without eating, they can develop a life-threatening liver condition called hepatic lipidosis. The transition has to be on their terms.
The whole point is to make the change so subtle they barely notice it’s happening. Below is a good general guideline, but remember to watch your cat and adjust the timing based on how they're reacting.
A Realistic Transition Timeline
Think of this as a starting point. Keep a close eye on your cat’s appetite, energy levels, and what’s happening in the litter box. Those are your best indicators of how things are going.
- Week 1 (Days 1-7): Start by mixing just 25% of the new food with 75% of their old food. Stir it in really well so they can’t just eat around it. This is the first test.
- Week 2 (Days 8-14): If the first week went smoothly, you can move to a 50/50 split. By now, they should be getting used to the different taste and texture.
- Week 3 (Days 15-21): Time to tip the scales. Move to a mixture of 75% new food and only 25% old food. You’re almost there!
- Week 4 and Onward: Success! You can now serve 100% homemade food.
What if your cat turns their nose up at one of the stages? No problem. Just drop back to the previous ratio for another few days before trying to increase the new food again. Let your cat set the pace.
Got Questions About Making Cat Food? I've Got Answers.
Diving into making your own cat food can feel like a huge step. It’s totally normal to have a ton of questions—I know I did when I first started! It's a big deal, and you want to get it right. Let's tackle some of the most common questions I hear from other cat lovers.
Is This Really Going to Be Cheaper?
That's the big question, isn't it? Upfront, you might see some costs that make you pause. A good meat grinder isn't cheap, and you'll probably buy supplements in larger quantities. But once you're set up, the per-meal cost often ends up being the same as, or even less than, what you'd pay for a premium commercial raw or wet food.
Honestly, the real savings aren't just at the checkout. The true value comes from knowing exactly what's in your cat's bowl and the potential for better long-term health, which could mean fewer expensive vet visits later on. A great tip is to buy your meat in bulk or watch for sales—that’s how you really bring the cost down.
What If I'm Not Comfortable With Raw Meat? Can I Cook It?
Absolutely, you can gently cook the meat. Just know that heat changes things nutritionally. The biggest issue is that cooking destroys some of the naturally occurring taurine, an amino acid that’s non-negotiable for your cat's heart and vision. So, if you go the cooked route, you'll need to add extra taurine back in after the food has cooled down.
Crucial Safety Warning: Never, ever feed your cat cooked bones. The cooking process turns them brittle and sharp. They can splinter into shards that can cause devastating, even fatal, internal injuries. If you choose to cook the meat, you have to remove all bones and substitute them with a calcium source like bone meal.
How Can I Be Sure the Food Is Nutritionally Complete?
This is, without a doubt, the most critical question. Feeding your cat an unbalanced diet is incredibly dangerous and can lead to serious health issues. The only safe way to do this is to follow a recipe that's been carefully formulated by a veterinary nutritionist or comes from a highly reputable, science-backed source.
This isn't the time to improvise or estimate. Supplements, in particular, need to be measured precisely. The recipe in this guide is built on established feline nutritional requirements, ensuring the right ratios of muscle meat, organs, and bone. Still, I always tell people to have a chat with their vet before making any major dietary changes. They can help you decide if it's the right move for your cat's specific health profile and age.
My Cat Turns Her Nose Up at Everything. How Do I Get Her to Try This?
Ah, the picky eater. I've been there. Patience is your number one tool here. Cats are creatures of habit and are naturally wary of anything new in their bowl. The trick is to go slow—I mean really slow.
Here are a few tactics that have worked for me:
- A Tiny Taste: Put a very small amount of the new food on a separate dish next to their regular meal. No pressure, just let them investigate.
- The Sneak Attack: Mix less than a teaspoon of the new food into their old stuff. Make sure it's stirred in really well.
- Warm It Up: Gently warming the food can make it smell much more enticing. Just use some warm water, never a microwave, which can cook the bone fragments and create hot spots.
- The Magic Topper: A little sprinkle of something they already love, like bonito flakes, can often convince them to take that first bite.
For some seriously stubborn cats, this transition can take weeks, maybe even months. Don't give up!
Here at Cat Food Rankings, our goal is to give every owner the information they need to make the best nutritional choices. If you're looking at commercial foods while you get ready for your homemade adventure, our platform can help you compare thousands of options by cost, ingredients, and nutritional data. Explore the data and find what’s best for your cat.